Read Time
min
Insights
Nov 25, 2025
How to add a HubSpot form to Framer
By adding a HubSpot form to Framer, lead management becomes easier as user inputs are automatically sent to HubSpot, streamlining communication. Quick installation and integration enable efficient data collection.


Contents
Table of Contents
What is HubSpot?
HubSpot is a platform that connects marketing, sales, and service tools with an integrated CRM database. By embedding the lead form provided by this platform directly into your Framer site, user inputs are sent directly to your HubSpot account, making lead management convenient.
Finding your HubSpot form ID
To link a HubSpot form with Framer, you need two unique identifiers: portal Id and form Id.
Open an existing form or create a new form in HubSpot.
Click the
Embedbutton located in the top-right corner of the form editor.In the modal that appears, the Embed code will be displayed, and you can copy the
portal Idandform Idvalues from there.

Adding HubSpot components in Framer
Once the form ID is ready, switch to your Framer project to add the HubSpot component. Framer provides dedicated components for HubSpot forms, allowing you to visually integrate and manage them effectively.
Open your Framer project.
Scroll down in the left Insert panel to find the Forms section.
Select the
HubSpotcomponent and drag and drop it onto the canvas.

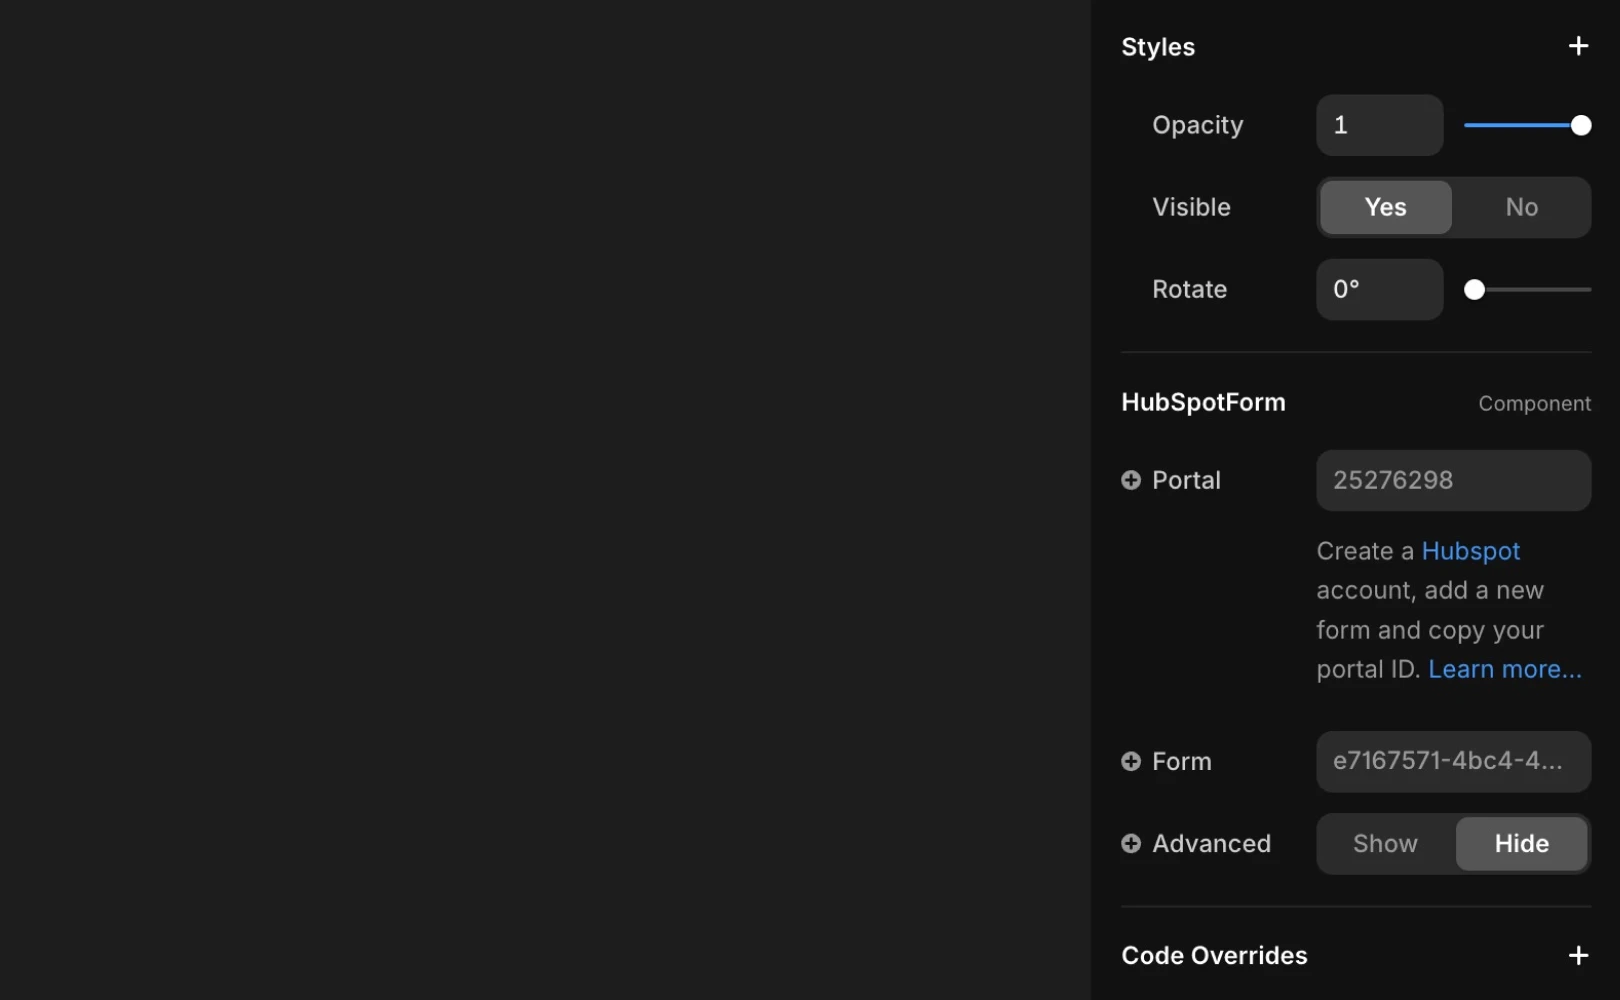
Connecting HubSpot forms
Now, select the component that you placed on the canvas and connect the IDs copied earlier to the HubSpot form.
Select the HubSpot component from the page.
Find the
portal Idandform Idfields in the right panel.Paste the values into these fields to establish the form connection.
Managing form design in HubSpot
While forms can be positioned in Framer, any modifications to form design or functionality must be done in HubSpot. Use the HubSpot form editor to adjust fields, style, and behaviors. Ensuring the design matches your brand's mood is essential.
Pre-publish checks
After adding the form and connecting the IDs, test to ensure everything works correctly. Before publishing, we recommend checking the items below to ensure they display correctly. Once all is verified, click Publish to publish your site. This will enable the information submitted by visitors to directly reach HubSpot for collection.
Switch to Preview mode and check layout and functionality operation
Verify that submissions are processed correctly after input
Native forms offered by Framer
Instead of HubSpot, you can also use the form system built into Framer, which offers the following features:
More than 10 different input types designed for various use cases
Interactive forms (e.g., success, error, loading) for UX enhancement with configurable UI
Various submission methods such as email, Google Sheets, Webhook, etc.
Built-in spam prevention and Rate Limiting features for enhanced security
Note: For steps on setting up native forms offered by Framer, please refer to this guide.
Useful situations for HubSpot forms
Integrating HubSpot forms on a Framer site can help simplify communication, collect insights, and organize data more efficiently. Some common scenarios include:
Inquiry forms: Add a "Contact Us" form to enable users to reach out to your team. Using placeholder text can help visitors input relevant information.
Support request forms: Route incoming support issues through structured HubSpot forms for centralized management.
Feedback collection forms: Gather thoughts and ideas about products to better understand users, using this data to prioritize new features or changes.
If you encounter any issues or find it challenging to connect, please reach out to the support team via the Framer Contact page.
Frequently Asked Questions (FAQ)
Q. Can the design of HubSpot forms be directly modified in Framer?
No. Design changes for HubSpot forms can only be made within HubSpot itself, while Framer only allows adjustments to position/size/layout.
Q. Can multiple HubSpot forms be added to a single Framer page?
Yes. As long as each form has a different
portal Id/form Id, multiple forms can be added without issues.
Q. Do I need to reconnect in Framer if I change form contents in HubSpot?
No. Even if fields or text are changed in HubSpot, as long as the
portal Id/form Idremain the same, Framer automatically loads the latest structure.
This article is a translated and adapted version of Framer's official blog content, ‘Adding HubSpot forms to your site’.
More posts


