Read Time
min
Design
Jul 17, 2025
How to Add a Video Component in Framer
Learn how to easily add and configure video components in Framer, and get information on optimizing user experience with specific settings like autoplay and thumbnail quality adjustments when integrating with YouTube and Vimeo.


Contents
Table of Contents
How to Add Video Components
Click the
[+] Insertbutton from the top menuNavigate to the
MediasectionDrag the desired video component onto the canvas
Available components include the basic Video component, YouTube component, and Vimeo component. The options you can configure vary depending on the component you choose.
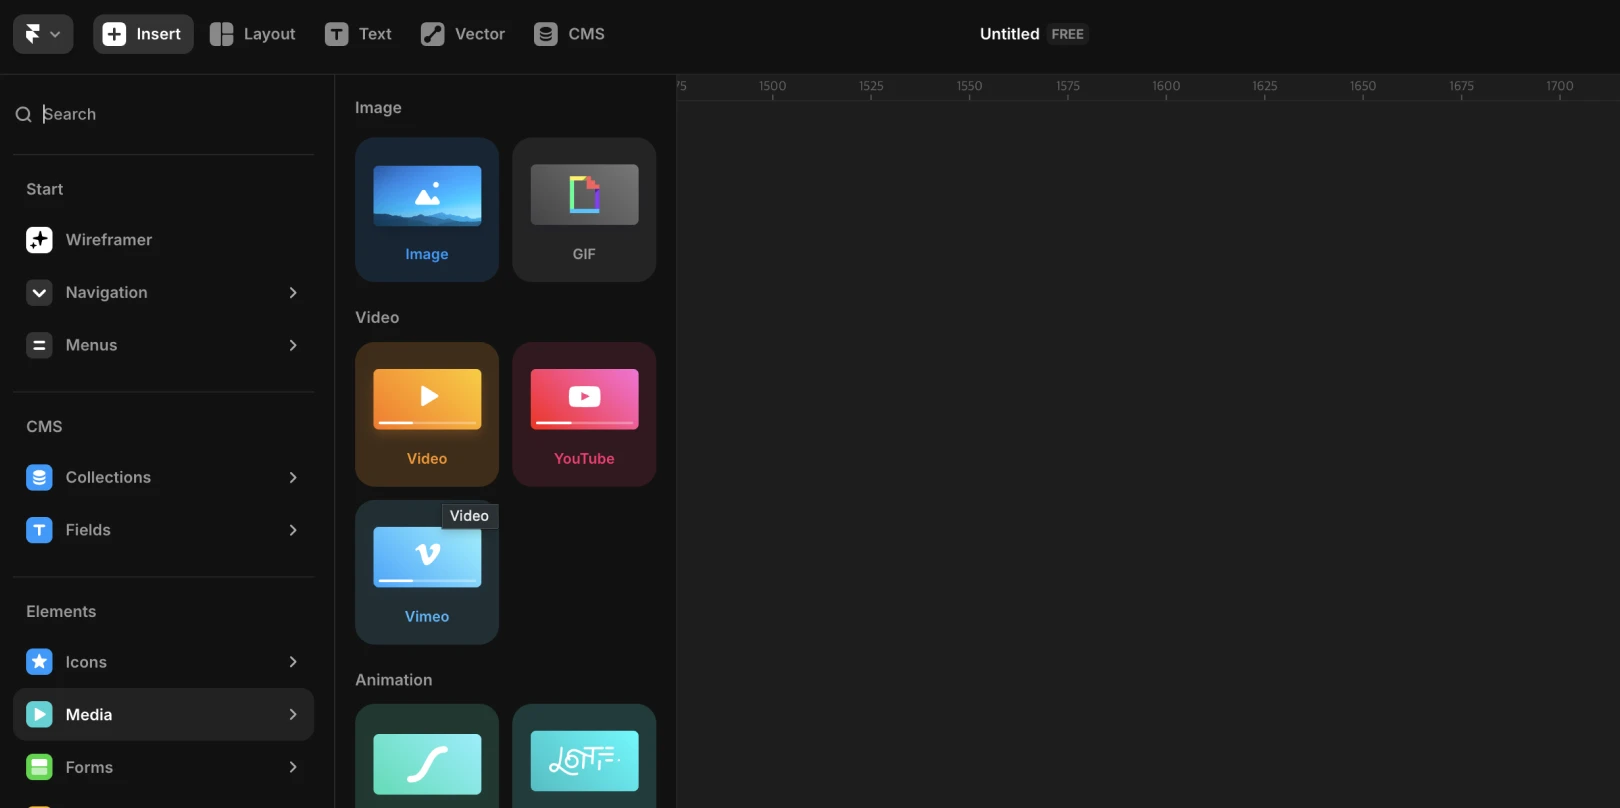
Detailed Video Component Settings
After inserting a video in Framer, you can adjust various properties in the right panel to configure it as desired. Each item directly impacts the user experience, so it's important to understand what each setting means.
Source
Select the
Uploadtab, then click theChoose Filebutton to upload a video directly from your local files, typically in.mp4or.webmformats. If you wish to use an external URL, select theURLtab. Enter a YouTube or Vimeo video URL to embed the video automatically without any coding. A preview thumbnail is also generated automatically for easy use.Playing
If set to Yes, the video will auto-play as soon as the component is rendered. If set to No, it will not play until the user presses the play button.
Note: Mute must be enabled for auto-play functionality.Radius
This option allows you to round the corners of the video.
You can enter a number or press the rightmost icon to round all or specific corners.Poster
Setting this to Yes allows you to add a thumbnail that appears before the video plays. Use the
Image>Uploadbutton to insert the image you want. The poster image must be at least 60 x 30 pixels.Note: Thumbnails help with search engine optimization (SEO).Background
Specify the background color for the empty space surrounding the video.
Start Time
This lets you set the point at which the video starts as a percentage.
(For example, setting10%will play the video from the 10% mark.)Loop
If set to Yes, the video will automatically restart after it ends.
This option can be used for short demo videos or videos with repetitive effects.Fit
This specifies how the video fits into the component area.
Options | Description |
|---|---|
Cover | Fills the component area while maintaining the video’s aspect ratio. Some parts may be cropped. |
Fill | Completely fills the component, ignoring the original video ratio. Distortion may occur. |
Contain | Adjusts to show the entire video while maintaining the aspect ratio. There might be empty space within the component. |
Scale Down | Automatically reduces size if it's larger than the original. Small videos remain at their original size. |
None | Shows the video in its original size without resizing, which may not fit the component size. |
Controls
If Show is selected, controls for play/pause, timeline, etc., are visible.
If Hide is selected, the video control interface is not displayed, and users cannot interact with the video.Muted
To use auto-play,
Mutedmust be set to ‘Yes’. If audio is needed, set the video controller to ‘Show’ so users can choose to play audio themselves.
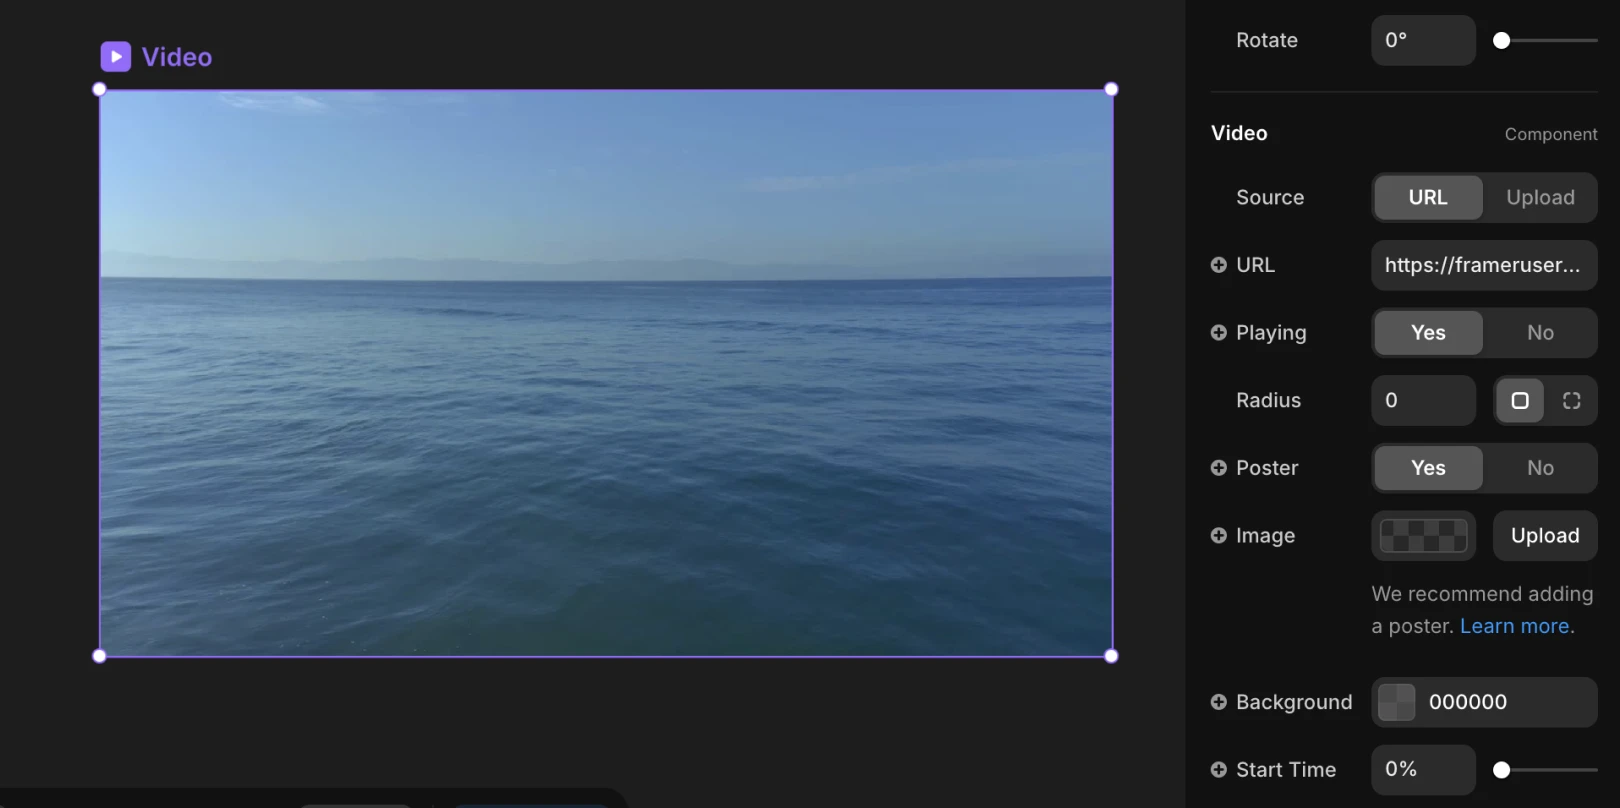
YouTube Component Settings Guide
In Framer, embedding a video is as easy as entering the YouTube link. You can customize diverse settings such as auto-play, thumbnail quality, and button colors, beyond the default settings.
Video
This is where you enter the URL for the YouTube video. Supports formats like
https://youtu.be/...orhttps://www.youtube.com/watch?v=....Autoplay
Off: Default setting. Users must manually start the video.
On: Auto-plays when the page loads.
Note : Mute must be enabled for auto-play on most browsers.Note: Framer’s integration with YouTube is limited to the URL, constraining features like Add Fetch.Thumbnail Quality
Thumbnails are used for performance optimization, serving as a preview image before the video loads.
Options:Low Quality,Medium Quality(default),High Quality,Off: Setting a thumbnail can be beneficial for site optimization, especially on performance-critical pages.
NotePlayer Color
Select the color of the YouTube player interface.
Options:Red(default YouTube theme),White(light interface theme)
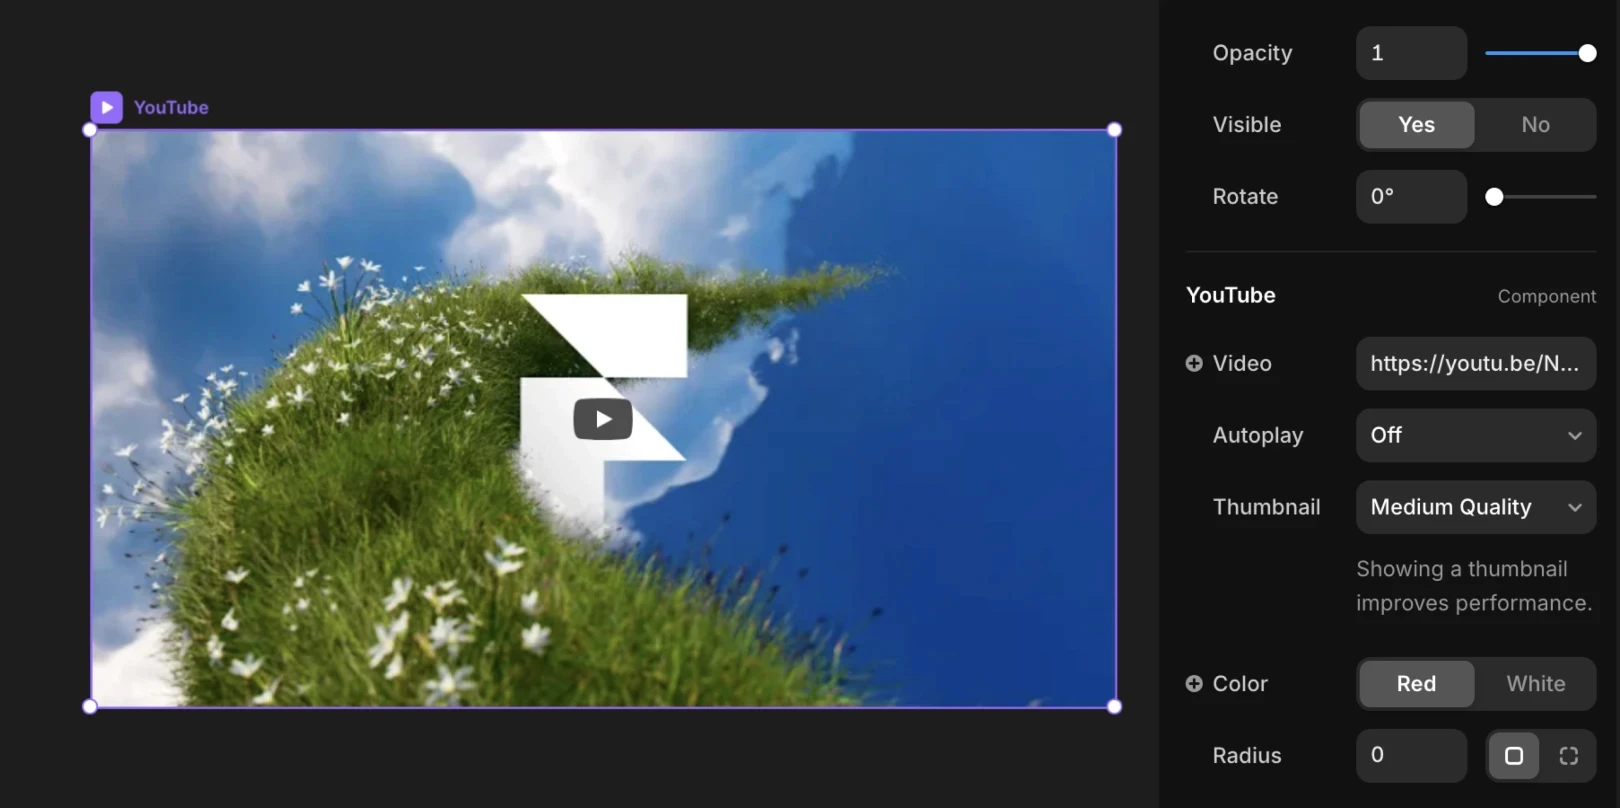
Vimeo Component Settings Guide
Vimeo is often used for high-quality video content or design-centric portfolio sites. Framer allows easy embedding with just a Vimeo URL and offers detailed settings for playback customization.
URL
Input your Vimeo video link here.
Example:https://vimeo.com/123456789Controls
Show: Displays Vimeo controls such as play/pause, volume, and fullscreen.
Hide: Shows only the video without the interface, suitable for portfolios or artworks where visuals are the focus.Autoplay
Yes: Automatically plays the video as soon as the page is loaded. Note: Mute must be enabled for auto-play on most browsers.
No: Users must manually start the video.
Autoplay Considerations
Most modern browsers like Chrome and Safari block auto-playing videos with sound. Therefore, to enable auto-play, you must enable the Muted option. For videos where audio is necessary, configure playback to require explicit user interaction, such as a click.
Note : It is also possible to set videos to autoplay when they enter the viewport. Go to the official Framer guide
Video Accessibility Considerations
If a video lacks audio, it is beneficial to provide a simple text description below the video for users with hearing impairments or those browsing with sound off.
Note : Check out this guideline for actual accessibility examples.
This content is a translated and adapted version of the Framer official blog article ‘Adding videos’.
More posts


