Read Time
min
Insights
Dec 3, 2025
How to link Framer forms with Clay
Connect Framer and Clay to achieve data automation. Data collected via Framer forms is automatically sent to Clay tables, making complex data organization simple.


Contents
Table of Contents
What is Clay?
Clay is a data automation/extension platform that resolves complex data collection and organization at once. By simply adding lists into Clay, it automatically generates complete lead information, verified emails, and even personalized introductory sentences. In simple terms, it connects an automation engine and over 100 external data sources to a regular spreadsheet.
Prerequisites
Before connecting Framer and Clay, ensure you have the following two items ready:
A Framer project with a form component
A Clay table to store data
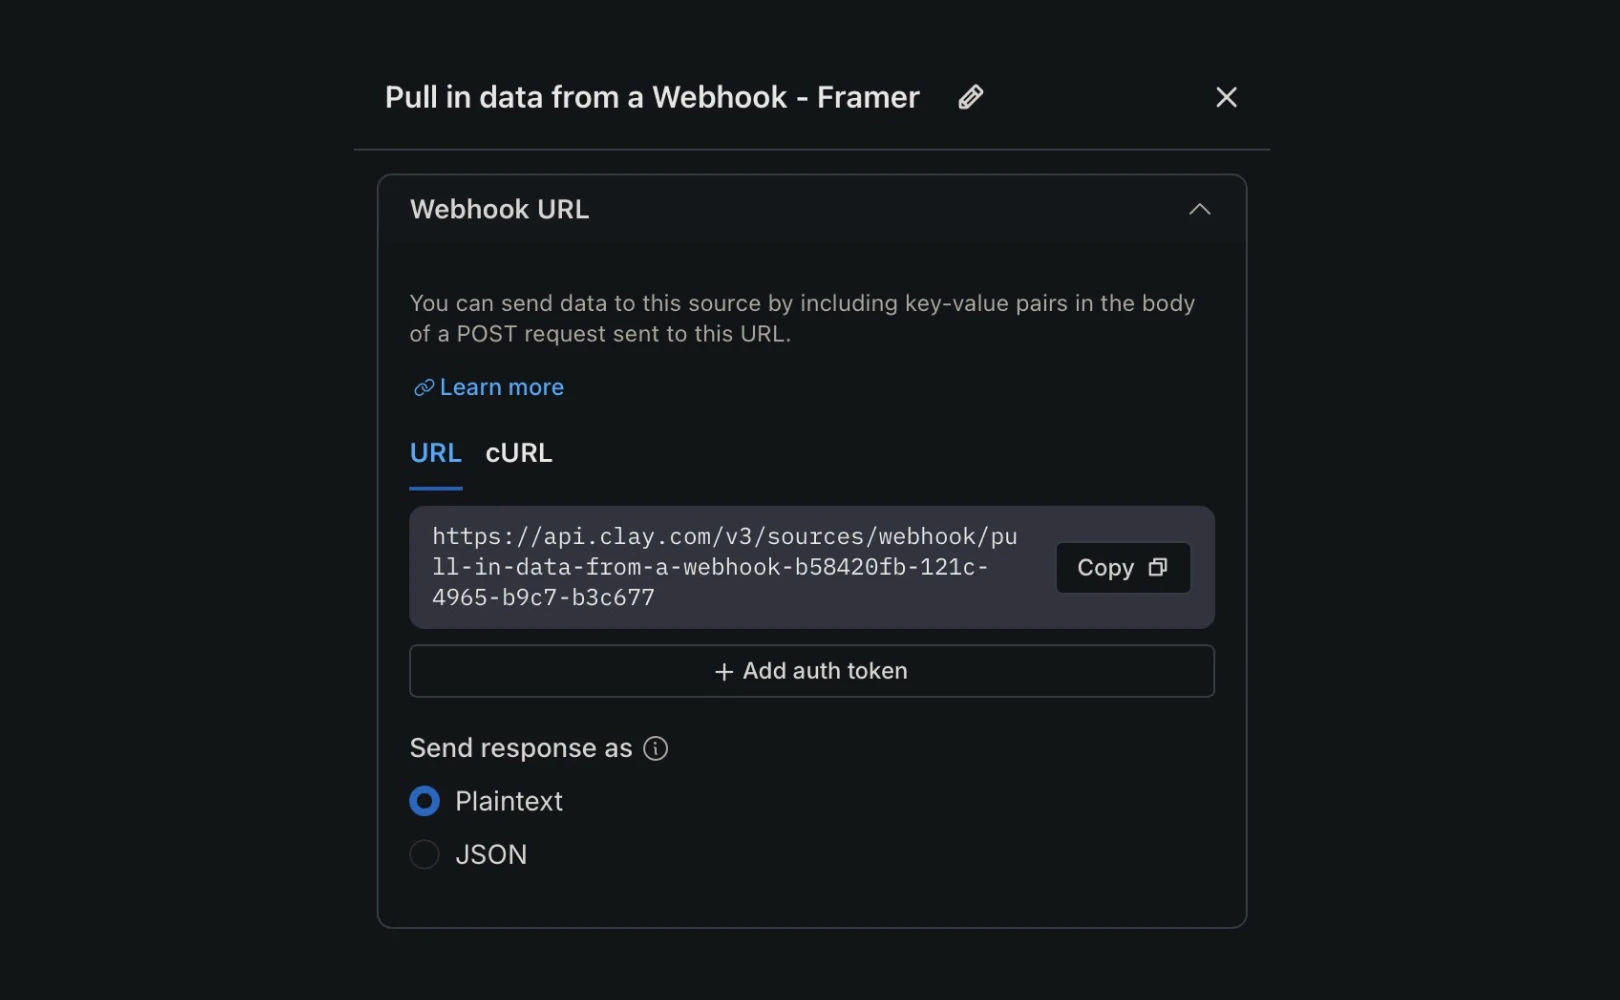
Creating a Webhook in Clay
First, create a Webhook URL to receive data from Framer. Think of a webhook as the address to which Framer sends data.
Open the Clay site and select the table where data will be stored.
Choose
Import Data→From Webhook.Copy the unique Webhook URL generated in Clay. Framer will submit the form to this URL.
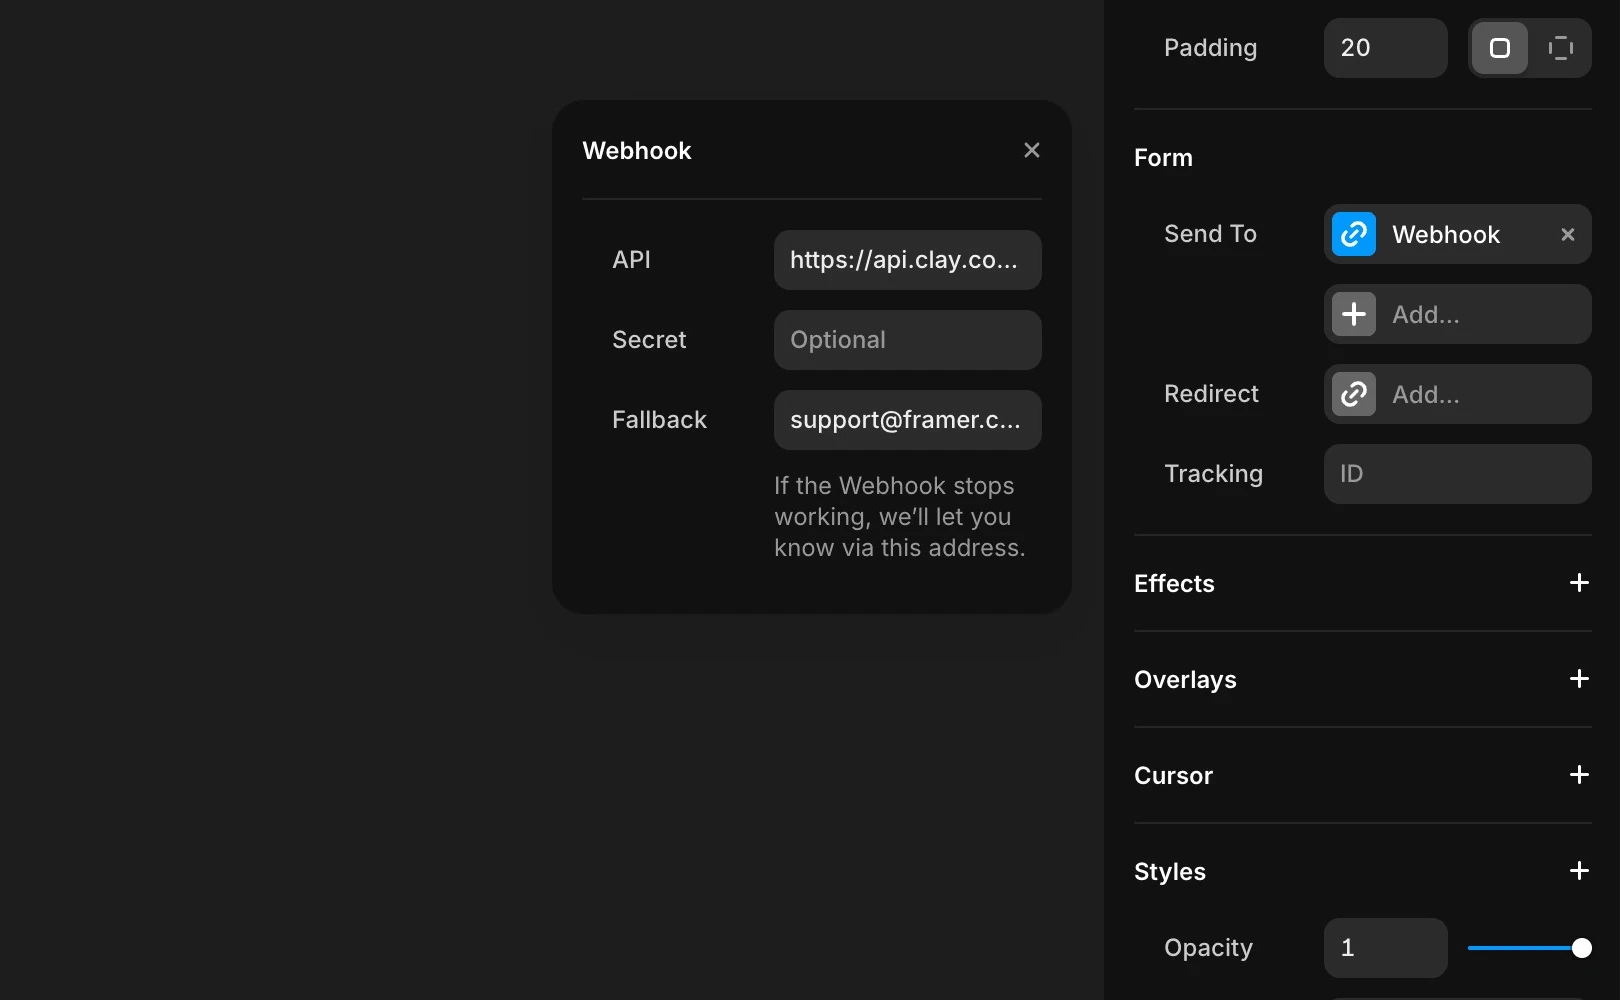
Connecting Framer form to Webhook
Now, connect the URL created in Clay to your Framer form so that when the form is submitted, the data is automatically sent to the Clay table.
Select the form component in your Framer project.
In the right panel, choose
Properties→Send Tosection, then selectWebhookas the target.Paste the Webhook URL copied from Clay into the input field to complete the connection.
Once the site is published, data is immediately sent to Clay upon actual submission.
Reviewing submitted data in Clay
To ensure the connection is successful, conduct a test.
Enter and submit arbitrary data directly on the published site.
After a few seconds, a new row will be added to the Clay table.
Subsequent submissions will be automatically added as new rows.
After establishing the connection, you can freely organize, extend, and automate the data seen in Clay.
Frequently Asked Questions (FAQ)
Q. Can I see data sent to Clay in Framer's Preview mode?
No, webhook requests may not be sent in Preview mode. Test on the published page to ensure proper delivery to Clay.
Q. If I change the Clay Webhook URL, will existing forms update automatically?
No, you must manually update the URL in the Framer properties panel if you change it.
Q. Can I customize error messages in Framer if a submission fails?
Yes, you can change the messages displayed during errors to your preferred wording within Framer.
This article is a translated and adapted version of the Framer official blog’s ‘Connect Framer forms to Clay’ content.
More posts


