

Read Time
0
min
Design
Get Started
Aug 20, 2025
Creating a Rotating Video Grid in Framer
Here's a step-by-step guide on creating a rotating video grid that scrolls in Framer. By applying rotation animations to both the container and the videos, you can achieve dynamic interactions.

Contents
Table of Contents
Subscribe to the Framer YouTube channel.
How to Create a Rotating Video Grid
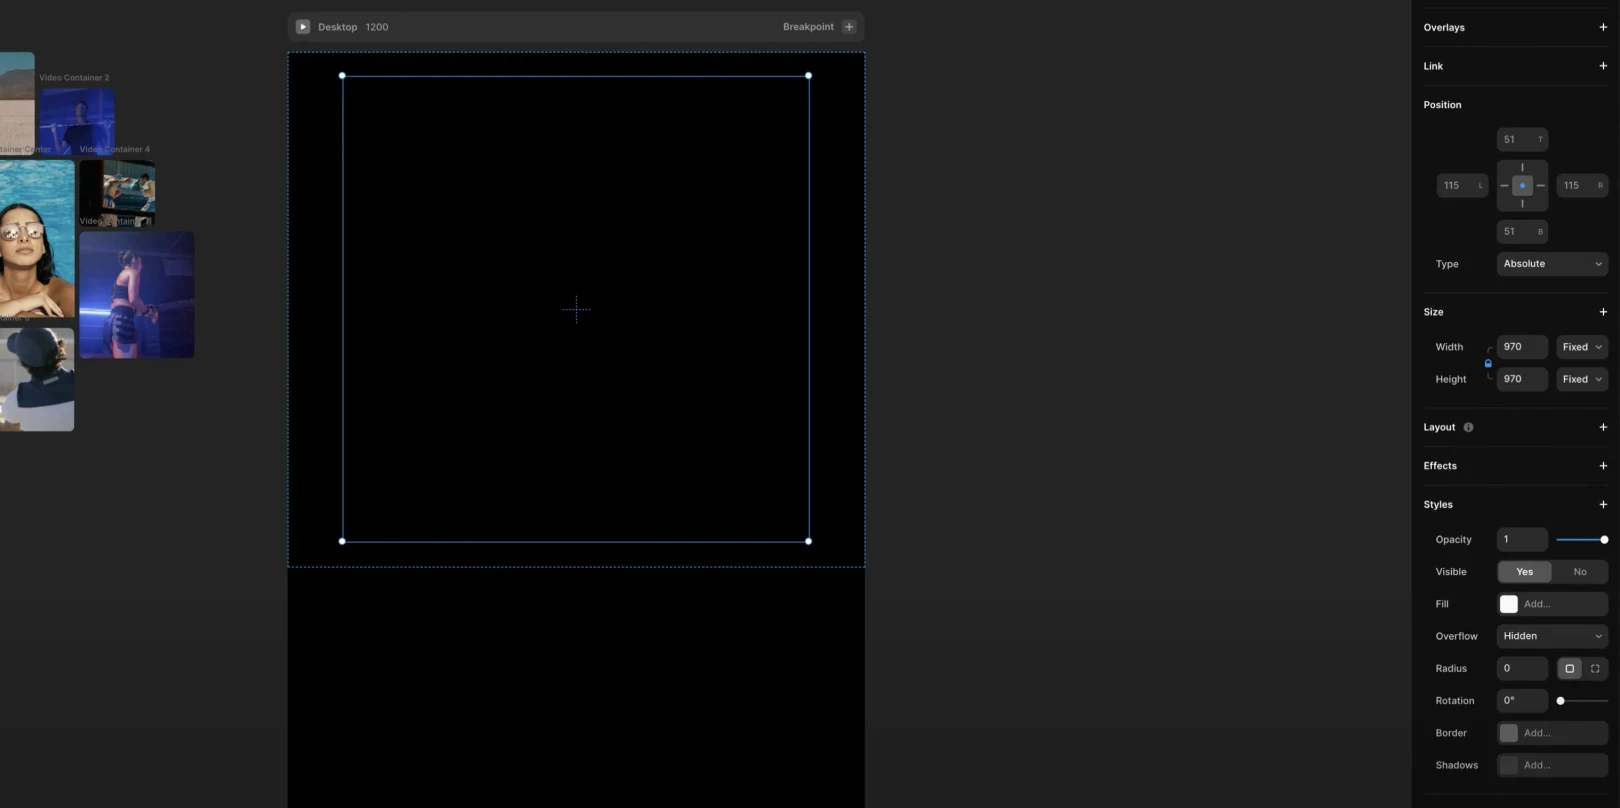
Step 1: Set Up Your Page and Base Frame
Create a new page in Framer.
Add a Frame (F) and stretch it to fill the entire width.
Set the height to about 1000px, then change it to
Height → Viewportto fit the full screen height.Remove the Fill.
Add a square frame inside this frame.
Set the size to width = height (set to 970 in the tutorial) and center-align it.
Remove the Fill.
Rename it to Container.
This container will hold the video grid area.
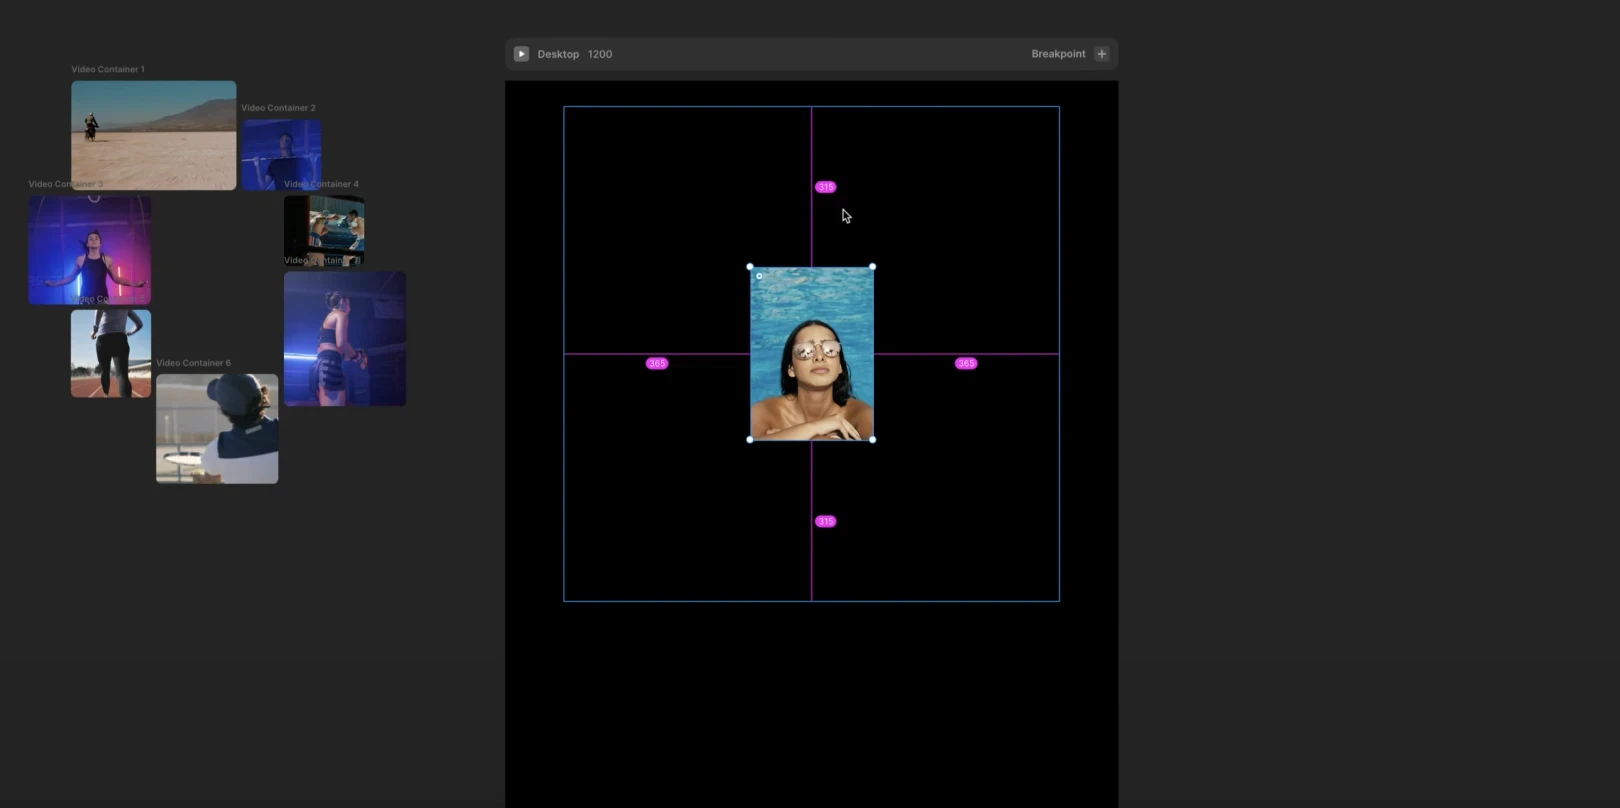
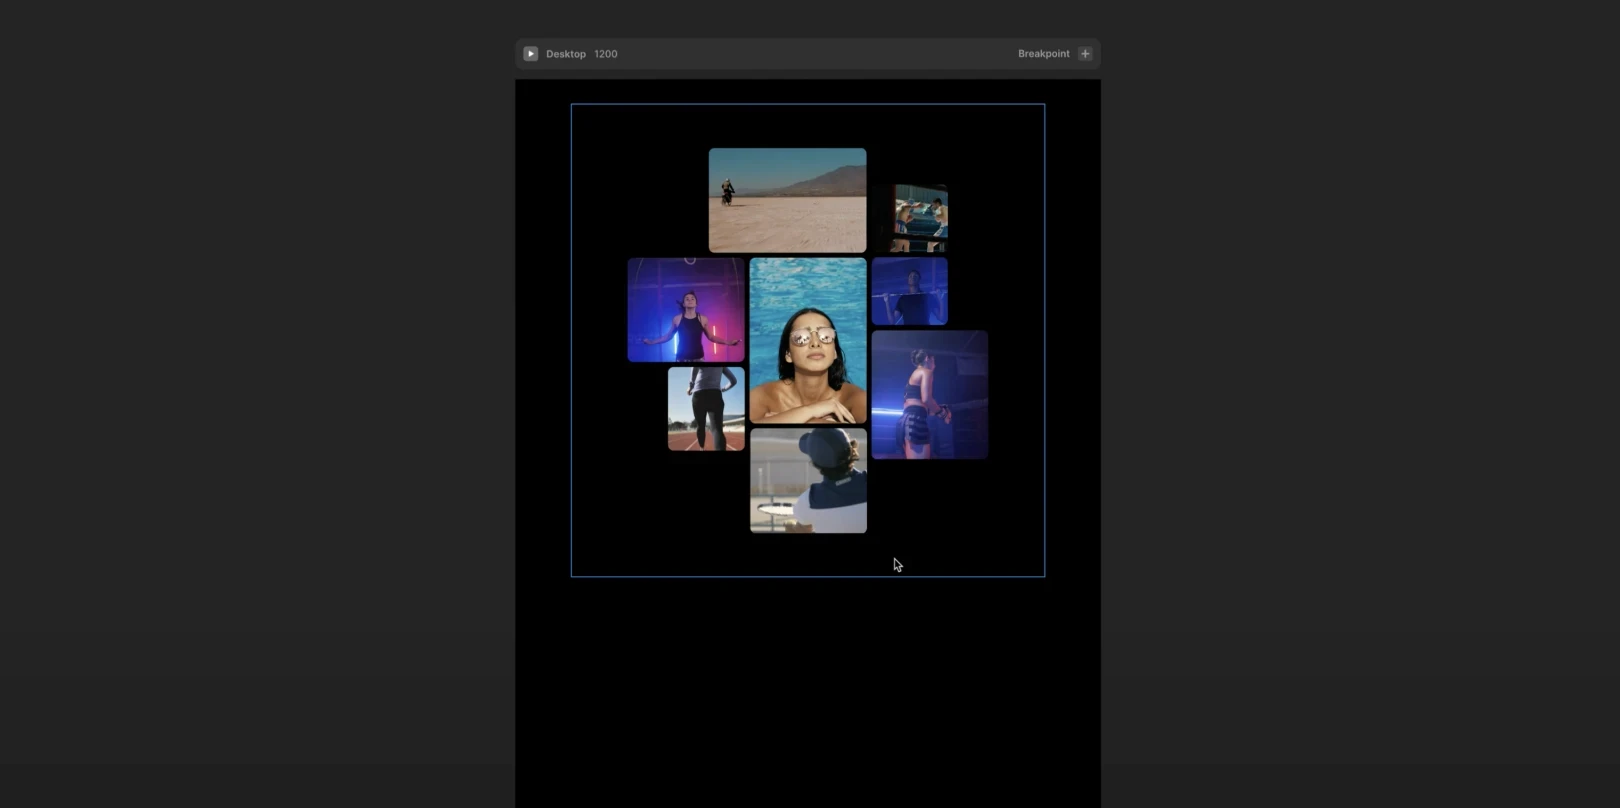
Step 2: Arrange the Video Grid
First, place the video that will go in the center in the middle of the container.
Ensure it's precisely centered.
Arrange the remaining videos in a grid format.
Align all videos so they fit within the container.
Step 3: Apply Scroll Animation to Container
Now that the grid is ready, let’s apply the rotation.
Select the container encompassing all videos and add the Scroll Transform effect.
Set the transformation for scrolling as follows:
Initial State: Opacity 1, Scale 1, Rotation 0On Scroll: Opacity 1, Scale 1, Rotation 450
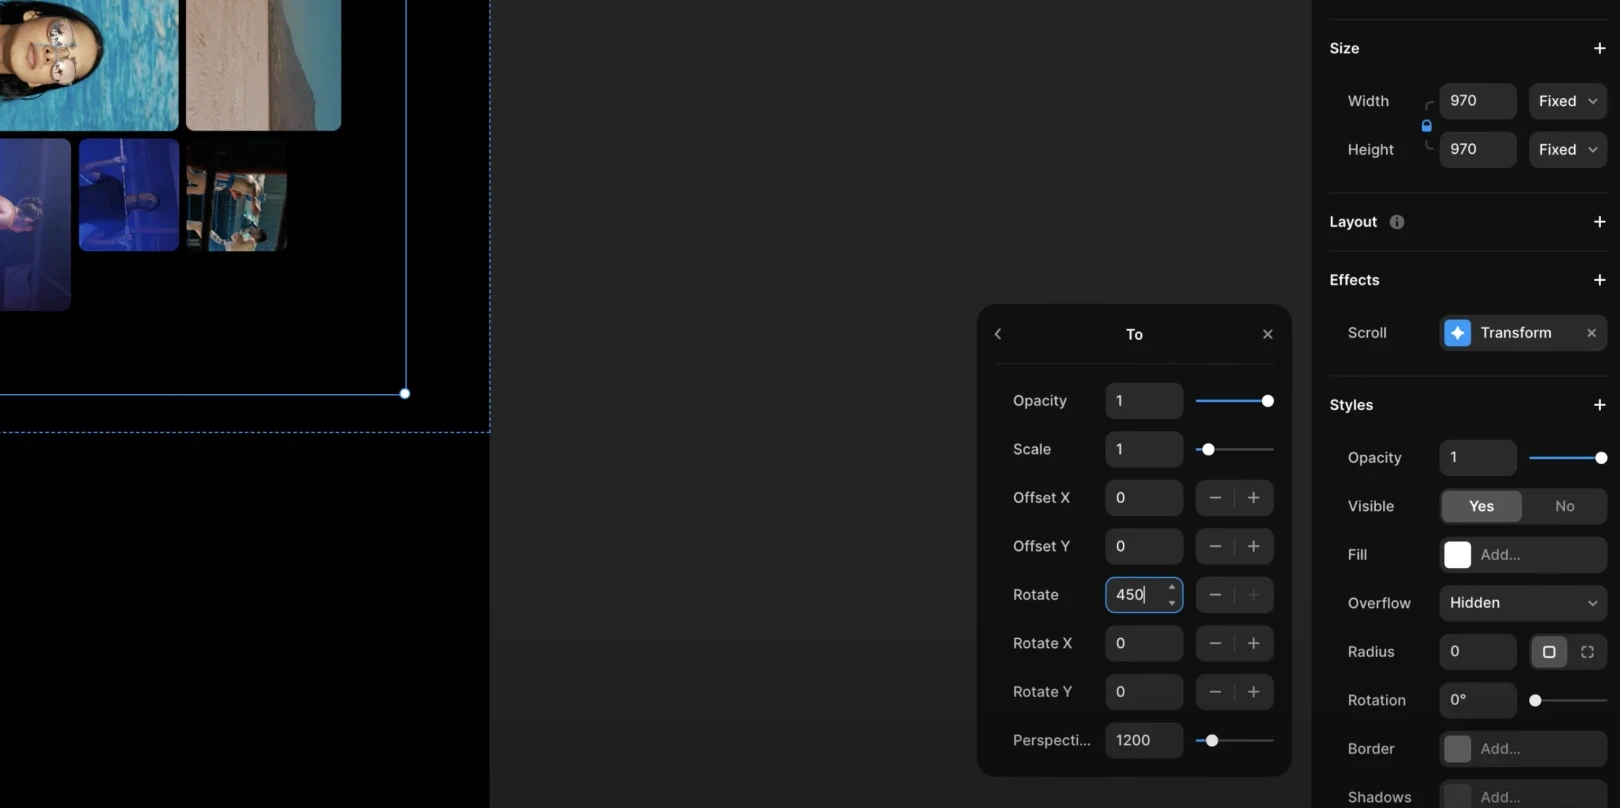
This will create a rotating effect on the entire container when scrolling.
Step 4: Apply Opposite Rotation to Videos
When the container rotates, the videos inside would normally rotate too. However, we want the videos to appear stationary.
Select all videos within the container and add the Scroll Transform.
Apply the same Scroll Transform effect, but reverse the rotation.
Initial State: Opacity 1, Scale 1, Rotation 0On Scroll: Opacity 1, Scale 1, Rotation -450
This way, the container rotates clockwise, but the videos rotate counterclockwise, creating the illusion that they're fixed in place.
Step 5: Adjust Video Size
To prevent clipping during rotation, enlarge the video size.
Select all videos and set their size to 170% relative to the container.
Step 6: Fix Scroll Position
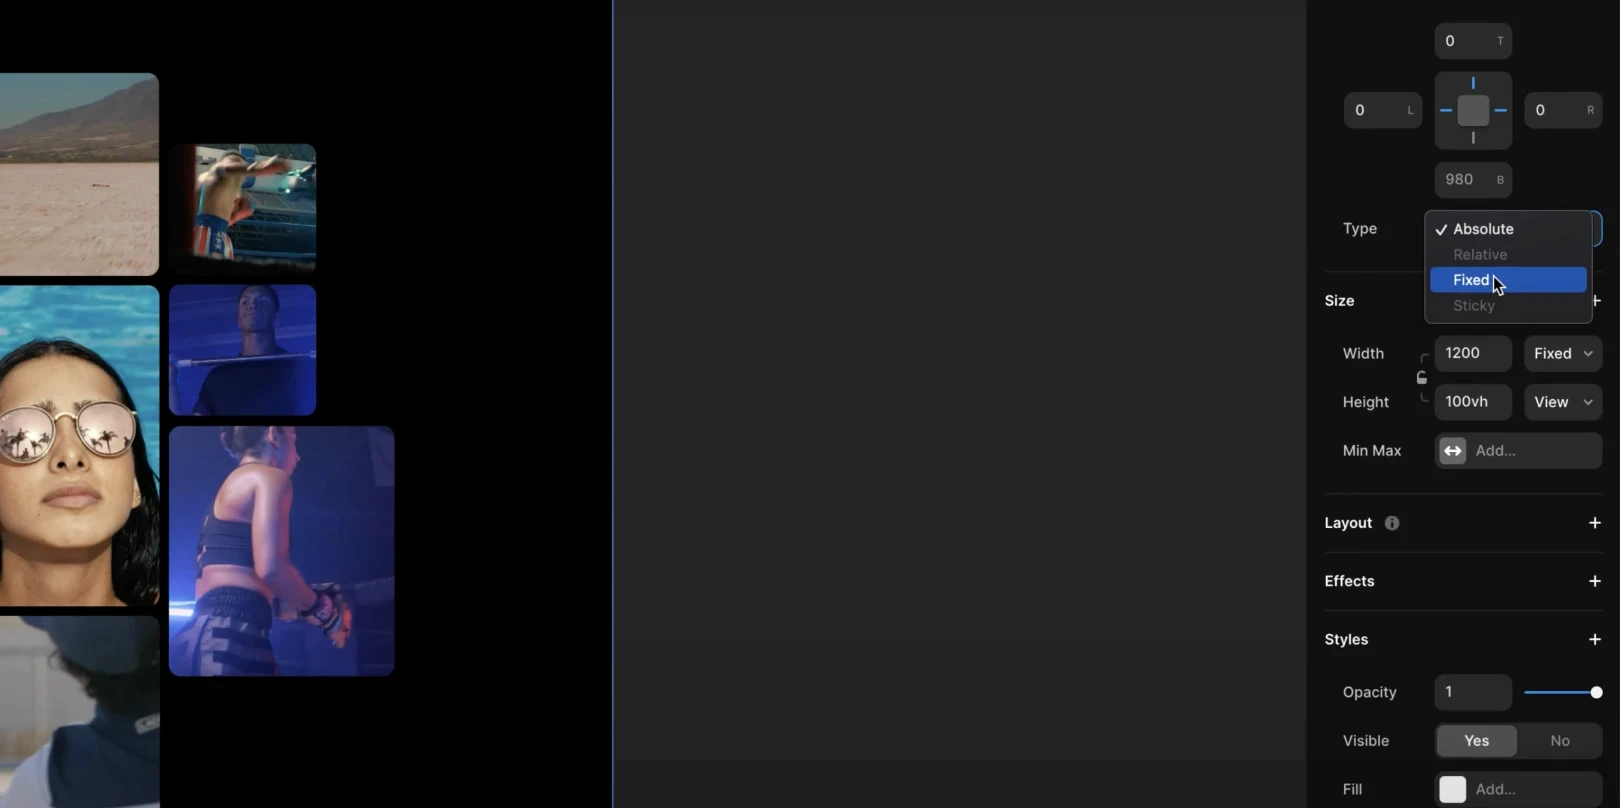
Ensure the container doesn’t scroll off the screen. Select the outermost frame (Height = Viewport) and change to Position → Fixed. This way, the container remains fixed, with only the scroll animation applied.
Additions
Add a Scale Effect
Modify the Scale in the container's Scroll Transform for more dynamic effects.
Example: Set to Scale 2.0 in the To state → creates an impression of zooming in along with rotation.
Add Interaction (Overlay)
Place a Play button over the central video.
Set the button to open an Overlay when clicked. (Place a full-screen video inside the Overlay, with a close function to return)
Now you can create the rotating video grid effect you saw on Twitter in Framer without any code.
In Framer, as in this tutorial, you can leverage features like Drag, Scroll Transform, and Overlay to achieve powerful interactions without complex coding.
See the effects and remix project→
This article is a translated and adapted version of Framer’s official blog post ‘Create a rotating video grid in Framer’.
More posts
Read More Blog

Design
Get Started
Dec 26, 2025
Increase your workflow speed in Framer using keyboard shortcuts

Design
Get Started
Dec 26, 2025
Understanding Framer's Reduced Motion Settings

Design
Get Started
Dec 26, 2025
Utilize text styles and semantic tags on your website

Design
Get Started
Dec 26, 2025